.sidebar .widget {border-bottom: 1px solid #000000;}
Showing posts with label tutorials. Show all posts

You Break Me Up!


Photo of four siblings to be used as example by Photoshop teacher
Before

"After" Photo of siblings seemingly broken by following Photoshop brush video tutorial
After
Learn to "break apart" a photo by creating your own brush settings. Make photos look as if they've been torn to shreds or cut into squares.  With a little manipulating, you could even create your own puzzle.

Here is the video to get you started:  School AccessPublic Access
Here is the photo to follow along, or you may use any photo you like:  Break Apart Photo

Board Book Remake with Photoshop


We have a beautiful little girl staying with us until her mother returns from deployment.  I decided to make a board book for the baby (she is still a baby, relatively speaking) with photos of her mother.  

Here is the first stage:  Creating the Pages in Photoshop

child's board book ready to be altered by Photoshop teacher
First I found a board book at the thrift store that had seen better days.  This one, 
in fact, was destined for the trash bin at the end of the week.
Board book remake in Photoshop: Room 626 Photoshop teacher Linda Miller measuring width of book
Next I measured the dimensions. 

Board book remake in Photoshop: Room 626 Photoshop teacher Linda Miller measuring height of book
It turned out that this one was exactly
six inches square.


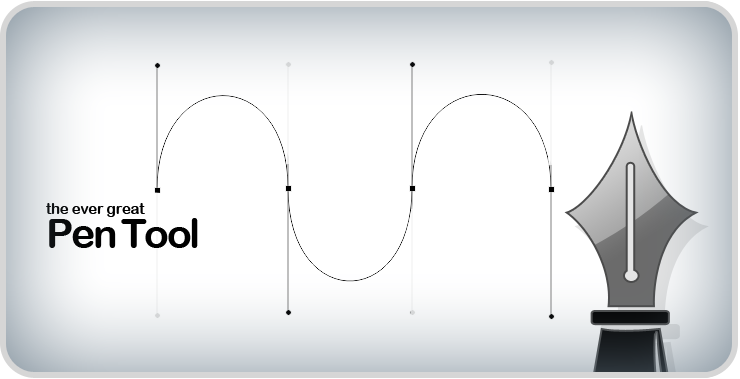
Introducing the Pen Tool


The Pen Tool is an exciting tool that will really enhance your Photoshop skills.  It is, however, probably the hardest tool to master.

Photos to Pencil Line Art

This would never have worked with the self portraits because of the amount of texture in portraits, but I thought it was an easy way to emulate the same type of image (at least the line art part) without all the work.

http://strikingphotography.net/2010/07/10/photos-pencil-line-art-photoshop-tutorial/

Fwd: RetouchPRO Tutorials

I stumbled across this tutorial and thought it was a great way to create folds in fabric.

Fwd: Painting Cloth and Hair in Photoshop - Tutorials - Mystical Modality

I love this technique because I love the smudge tool - one very underused tool in my opinion. I used this technique to smooth out fabric and create folds on a photo where the subject's white dress didn't flow correctly. But one day I'll experiment making these cool wings. :)

Subject: Painting Cloth and Hair in Photoshop - Tutorials - Mystical Modality

Fade tutorials

>
> Fading one image into another for an artistic effect:
> http://www.lunareclipse.net/basicfades.htm
>
> Gradually fading the background into a blur:
> http://www.creativepro.com/article/photoshop-how-to-lens-blur-with-alpha-channels

Red faced!

I have been working with photos for the Arc of the Hill Country site, and many of them have lighting issues. Some of the issues just can't be fixed--like a large light overhead casting a terrible glare. The problem with glares is that they create an absence of color and texture, so there's not really anything underneath to work with. The other problem has been a red tint to the skin of many of the subjects. I finally found this workaround, using a hue/saturation adjustment layer:
First, copy the layer (ctrl J), then...

1. Open a hue/sat adjustment layer, and select "reds."
2. Take the left eyedropper and click over the deepest red that needs to be fixed.
3. Next, take the eyedropper on the right ( - ), and click the skin tone you'd like to match.
4. Move the hue slider all the way to the left. The image will turn into magenta/blue one. Don´t worry.
**Now, look at the gray area between the two rainbow bars. There are two tiny tics within this area. Grab the tic on the right and move it to the left until only the area you want to fix has that magenta/blue stuff going on. It's okay if areas beyond the subject are selected--you will be erasing those later.

5. Move the hue slider to the right, beyond the original position until you reach your desired skin tone.

6. Now, merge the adjustment layer with the layer below.
7. Use your eraser, set with a hardness of about 50%, and erase the areas that you didn't want changed--for instance, someone's red shirt, or shoes, etc. Sometimes there will be nothing to erase...
8. Finally, merge down one more time, and you're done!

Enhancing Photos

I really love this photo of my son Mikey, but I hated the background (the original had power lines - I forgot to save a copy of the original [my bad])

Even after I removed the power lines, the sky is completely white, and the billboard is distracting. The image of Mikey also needs some sharpening and a blast of contrast.

The final version has
1 - a sky inserted into the background,
2 - the billboard removed, some of the trees replaced, (stamp tool)
3 - sharpening (Filter / Sharpening / Unsharp Mask)
4 - Auto Contrast (under the Image menu)
5 - This softening trick:
After merging all the layers, I copied that layer and applied a Gaussian blur of about 20 pixels, then changed the layer state to overlay. After that, just to take the saturation down a notch, I created a Hue/Saturation layer, and applied a Hue of +3 and lowered the Saturation to -3.
Here's the final version:

I also took out the other player. I haven't decided if I'm going to leave the sign in or not. What do you think? Reply with your opinion and get extra credit--but you have to tell my why I should or should not leave it in.

Guided Tour of Hot Technologies


You should check this out when you get the chance--you don't get access to everything (you have to but the program for that), but you can at least learn a little about Cha Cha, Zillow and other fun "Hot" technologies.