.sidebar .widget {border-bottom: 1px solid #000000;}

Wednesday, Sept. 4, 2013

Gaming Graphics:

Click on the "Gaming Graphics" link above. 
Click on the "Getting Started" link.
Watch and follow along with the "Skeleton Key" video.
After you are finished making the skeleton key, create 3 additional graphics using only the shape tools and the pathfinder.

Save your work to your desktop.

Photoshop 1: 
  1. Create 2 custom workspaces (see info below)
  2. Watch Mrs. Miller show you how to custom search for photos and images
  3. Begin watching Bridge videos

Watch and follow along with the video called Custom Workspace.  When you are finished, you should have a workspace that has been named with your first name.

Create another workspace with the following panels so that it looks like this and call it "my basic workspace."  Be prepared to show me both your workspace tabs.(Your workspace will save to your computer, but if you move computers they will not appear on the new computer.)


Photoshop 2:  Continue with videos and when you are finished here is your first assignment: 

iTunes U Images:
You will be creating four 700 x 700 pixel image that another teacher could use for their iTunes U class.  In order to get an idea of what is out there, go to your iTunes you app on your iPad and click on the Catalog.  A lot of the courses have spirals, which would be a neat feature if you can find an Action for it (remember those?).  But a spiral is not mandatory.

Use your imagination, but DON'T copy someone's work from the web--teachers need original images.  Make a collage, trace something with the pen tool, whatever.  If you want to use photos, you can use your own photos, or you can use photos that have been designated as free for your use that you can find from this page:

http://www.techradar.com/us/news/internet/web/12-best-places-to-get-free-images-for-your-site-624818

You will create 4 images in all:  2 must be from "core" subjects (math, English, etc.) and 2 can be from electives.  I will make these images available for teachers to use.  (And yes, you can choose to make one for me.)


Tuesday, Sept. 3, 2013

Photoshop 1:  Watch and follow along with the video called Photoshop Interface.  Because you are working in CS6 instead of CS5, there will be some changes.  One is that you need to have a file open to see some of the options.  So, once you have Photoshop open, go to File, New and click Okay.

If you can't find something, click on the Window menu and see if you can find it there.

When you are finished, you should have a painted letter on your canvas.  Go to File, Save As and save it to your desktop.


Watch Low vs High Quality Images when you are finished with the above assignment.

Photoshop 2:  Continue with the list of tutorials from Day 5.

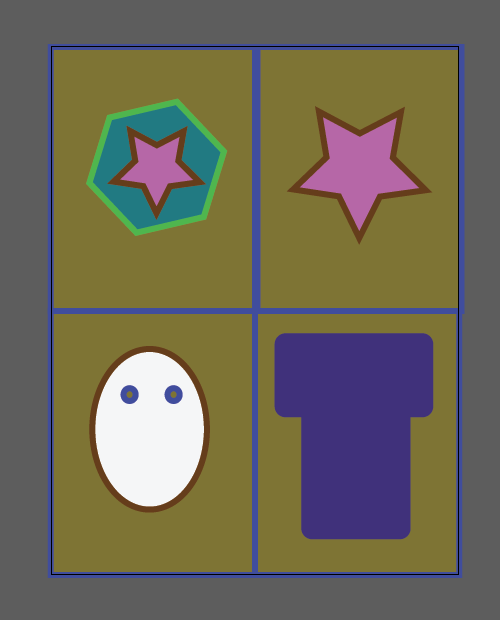
Gaming Graphics:  Today you are making this in Illustrator:


Day 5

All Classes 

Note:  You will no longer use your iPads to watch videos.   After completing the Student Info Sheet, use the computer to watch the video I've indicated for your class below.

All Sections:
  1. Go  to iTunes U and download Student Info Sheet
  2. Open the document in Notability
  3. Complete the information using text boxes and type
  4. Turn the document into eBackpack
Note:  here is a link to the Information Sheet if you can't access it through iTunes U.
Video:
Gaming Graphics: Click on this link to watch four Illustrator tutorials.

Photoshop 1:
Open Photoshop, then:
Watch and follow along with the video called:  Custom Workspace
(Forget how to get to the video page?  Click on the Resources tab above, then click on the link to the Graphics Design and Photoshop/Web Files)
After, complete these videos as well:


Photoshop 2 and 3 (Note:  if you had Photoshop last year, the videos with ** are optional)

Day 4

Photoshop 2 and 3:  Do the Tasks below, then set up your workspace (there is a video tutorial)
Photoshop 1 and Graphic Design for the Gaming Industry:
Today you will learn to move around the Mac a little more efficiently, and to set up your space to suit your taste.  Click on the
"Resources"
link above, then click
"Graphic Design and Photoshop/Web Files"
to find the site that hosts almost all the videos and files you will need for this class.

Watch the following videos, then complete the tasks below.  (Watch all the videos first.)
Mac 1, 2, and 3
Tasks:

  1. Although you cannot get to the Dock Preferences, you can go to the Apple, then Dock to move the Dock or change how it looks.  You do not have to change how it looks, but you do need to have the following on your dock: 
    • Photoshop (make sure to "dock" the application, not the folder)
    • Firefox
    • iTunes
    • Microsoft Word
    • System Preferences
    • iPhoto
    • iMovie
  2. Set up your "Places" (the guy in the video has an older computer and instead of "Places," he has "Favorites") sidebar in the following order, top to bottom:
    • Desktop
    • Documents
    • Applications
    • Pictures
    • Movies
    • Downloads
    • Anything else you want to keep in the Favorites can go after Downloads
  3. Set up your desktop background to show anything other than the basic one (Note:  you will have to find an image on the web and right click it to make it your background, because the Preferences is unavailable.)
  4. Create a shortcut to the "Graphic Design/Photoshop and Web Files" website

Day 2

If you missed today you missed a very exciting day!  Here's a recap:
We went over the rules (paying attention (learning to sleep with your eyes open), food/drinks, video games, wheelie chairs, checking out headphones, charging station.
We also found my blog (which you're reading now) and bookmarked it on the iPad.  I suggested that your parents find and click the button on my blog that will send them an email when I post, because that is my version of "Monday Mail."
We checked all the iPad downloads and settings, etc., and made folders for each class in Notability.

Homework:  Make sure that in Notability you know how to create a new document, insert a photo and insert a text box.   Also, if you were not able to enroll in my class (see yesterday's post if you need the numbers) you definitely need to do so!


1st Day of School

Everyone today had homework to log in to iTunes U and sign up for my class.
Here are the codes to sign up:

Photoshop 1 (Graphic Design & Ill.)
--> D7N-F6K-F5B  
Photoshop 2 (Advanced Graphic Design & Ill.)
--> FWN-H5S-N93 
Photoshop 3(Practicum in Graphic Design & Ill.)
--> DRZ-HMT-9EE 
Graphic Design for the Gaming Industry (Print & Image Design)
--> FMQ-AYQ-MBD 
Read my "teacher speech" about why we have iPads (and why it's definitely a Good Thing!).


Photoshop 2 assignment

Graphic Design/Photoshop 1:
Assignment:

  • Cont. with super hero
Advanced Graphic Design/Photoshop 2: 
Assignment: 
  •  Use the following images to create one seamless image.  Make sure the resolution stays the same.
  • Photo 1
  • Photo 2

Digital Graphics:
Assignment:
  •  Cont. with final project

Final Projects

Graphic Design/Photoshop 1:

Assignment:  Voting and Final Project

     Vote on favorite text portraits:  Click on the "blogs" link above and look through the blogs for your assigned classes.  On a piece of paper, write down the "posted by" name that you see at the bottom of the post.
    2nd period vote on 3rd and 4th
    3rd period vote of 4th and 5th
    4th period vote on 5th and 6th
    6th period vote on 7th and 2nd
    7th period vote on 4th

Final Project:  Turn Yourself into a Super HeroDownload the superhero zip file.
Open the zip file and find the super_hero_poster.html file.  Double click that file to open it.
You are only doing part 1, but please make sure you look at the examples at the bottom of the page.

Here is how you complete the Superhero worksheet:
Open the Super Hero  worksheet that is in the same zip file you downloaded.
Copy the questions.
Go to your blog.  Create a new post and paste the questions into the post.
Answer the questions.
Publish your post.

 
Advanced Graphic Design/Photoshop 2: 
Assignment: 

1st:  Correct your videos!
  • Title page with the name of your project, your name, name of song and artist.
  • Make sure your music is school appropriate
  • Your music should fade at the end
  • The video should end with the final project on the screen for at least 5 seconds
Final Project:  Create an ebook from your blog.
  • Yes, that is all the directions you get.  

Digital Graphics:
Assignment:
  • Final Project: Create a music video using images provided.  Your audience is a group of Life Skills students and their parents and teachers.
  • The theme of the video is "end of year."
  • Find examples on Youtube (I will help you log in)
  • Decide on  music and find a Youtube video with that music.
  • Download the video, extract the music from it and use it for your video. (If you already have the music you can skip this step.)
  •  
Requirements:
  1. Title page: 
    Give your video a title making sure you use Ms. Davison's name.  Something like:  Ms. Davison's Class, 2012-13
    Your name
    Name of music and band
  2. Transitions
  3. Music fades at the end
  4. Credits

Survey

Complete this survey. Let me know when you have it completed.

Thursday and Friday

Graphic Design/Photoshop 1:
Assignment:

Advanced Graphic Design/Photoshop 2: 
Assignment: 
  •  Keep up with previous work

Digital Graphics:
Assignment:
  • Keep working on Photoshop tutorials 
Graphic Design/Photoshop 1:
 

Assignment: Do not work on any other assignments but this!
  •  Exam prep tutorial 2:  use the image to follow along with the videos.  Upload a screenshot showing your final step
  •  Flash cards (study for exam)
  • You will be taking the exam tomorrow.  If you have time today, go back over the first exam prep tutorial in order to refresh your memory.


Advanced Graphic Design/Photoshop 2: 
Assignment: 
  •  Exam prep tutorials 1 and 2 or Take Exam
  • Or
  • Youtube Banner Assignment
    Create a banner for the district for their Youtube Channel.
    The link above will give you measurements for all devices. 
    Banner needs to be viewable in all devices, so the main information in the banner should fit in the "Text, Logo safe area."
  • Remember your audience (logo will need to be approved by district administrators)
  • Use the following overall dimensions:  2560 pixels wide, 1440 pixels tall, 200 dpi (resolution) in case they wish to use it for print later on.
  • Here is what they are using now.  The only thing that needs to be kept is "New Braunfels I.S.D."  Everything else is open for change.
  • Remember, the work needs to be your own.  This is how I would do it:
    • Find examples of Youtube Channel logos
    • Look at images on the district web site as well as other campus web sites to get a "feel" for what administrators have already approved
    • Gather images I think would be appropriate (any images--at first, all I'm looking for is a representation of the images I think should be used) 
    • Arrange images, text, backgrounds, etc.
    • Trace (pen tool) around the final images I've decided on. Significantly change images so they fit with my banner and they are not the same images I started with.
  •  Keep the Photoshop file, but save a copy as a .png and "share" it with Mr. Hawes and me.
    Digital Graphics:
    Assignments this week:
    Graphic Design/Photoshop 1:
    Assignment:

    •  Exam prep tutorial 1:  use the image to follow along with the videos.  Upload a screenshot showing your final step
    •  Flash cards (study for exam)
    • You will be taking the exam tomorrow.  If you have time today, go back over the first exam prep tutorial in order to refresh your memory.
    Advanced Graphic Design/Photoshop 2: 
    Assignment: 
    •  Exam prep tutorials 1 and 2 or Take Exam
    • Or
    • Youtube Banner Assignment
      Create a banner for the district for their Youtube Channel.
      The link above will give you measurements for all devices. 
      Banner needs to be viewable in all devices, so the main information in the banner should fit in the "Text, Logo safe area."
    • Remember your audience (logo will need to be approved by district administrators)
    • Use the following overall dimensions:  2560 pixels wide, 1440 pixels tall, 200 dpi (resolution) in case they wish to use it for print later on.
    • Here is what they are using now.  The only thing that needs to be kept is "New Braunfels I.S.D."  Everything else is open for change.
    • Remember, the work needs to be your own.  This is how I would do it:
      • Find examples of Youtube Channel logos
      • Look at images on the district web site as well as other campus web sites to get a "feel" for what administrators have already approved
      • Gather images I think would be appropriate (any images--at first, all I'm looking for is a representation of the images I think should be used) 
      • Arrange images, text, backgrounds, etc.
      • Trace (pen tool) around the final images I've decided on. Significantly change images so they fit with my banner and they are not the same images I started with.
    •  Keep the Photoshop file, but save a copy as a .png and "share" it with Mr. Hawes and me.

    Digital Graphics:
    Assignment: